1.What is Helm ?
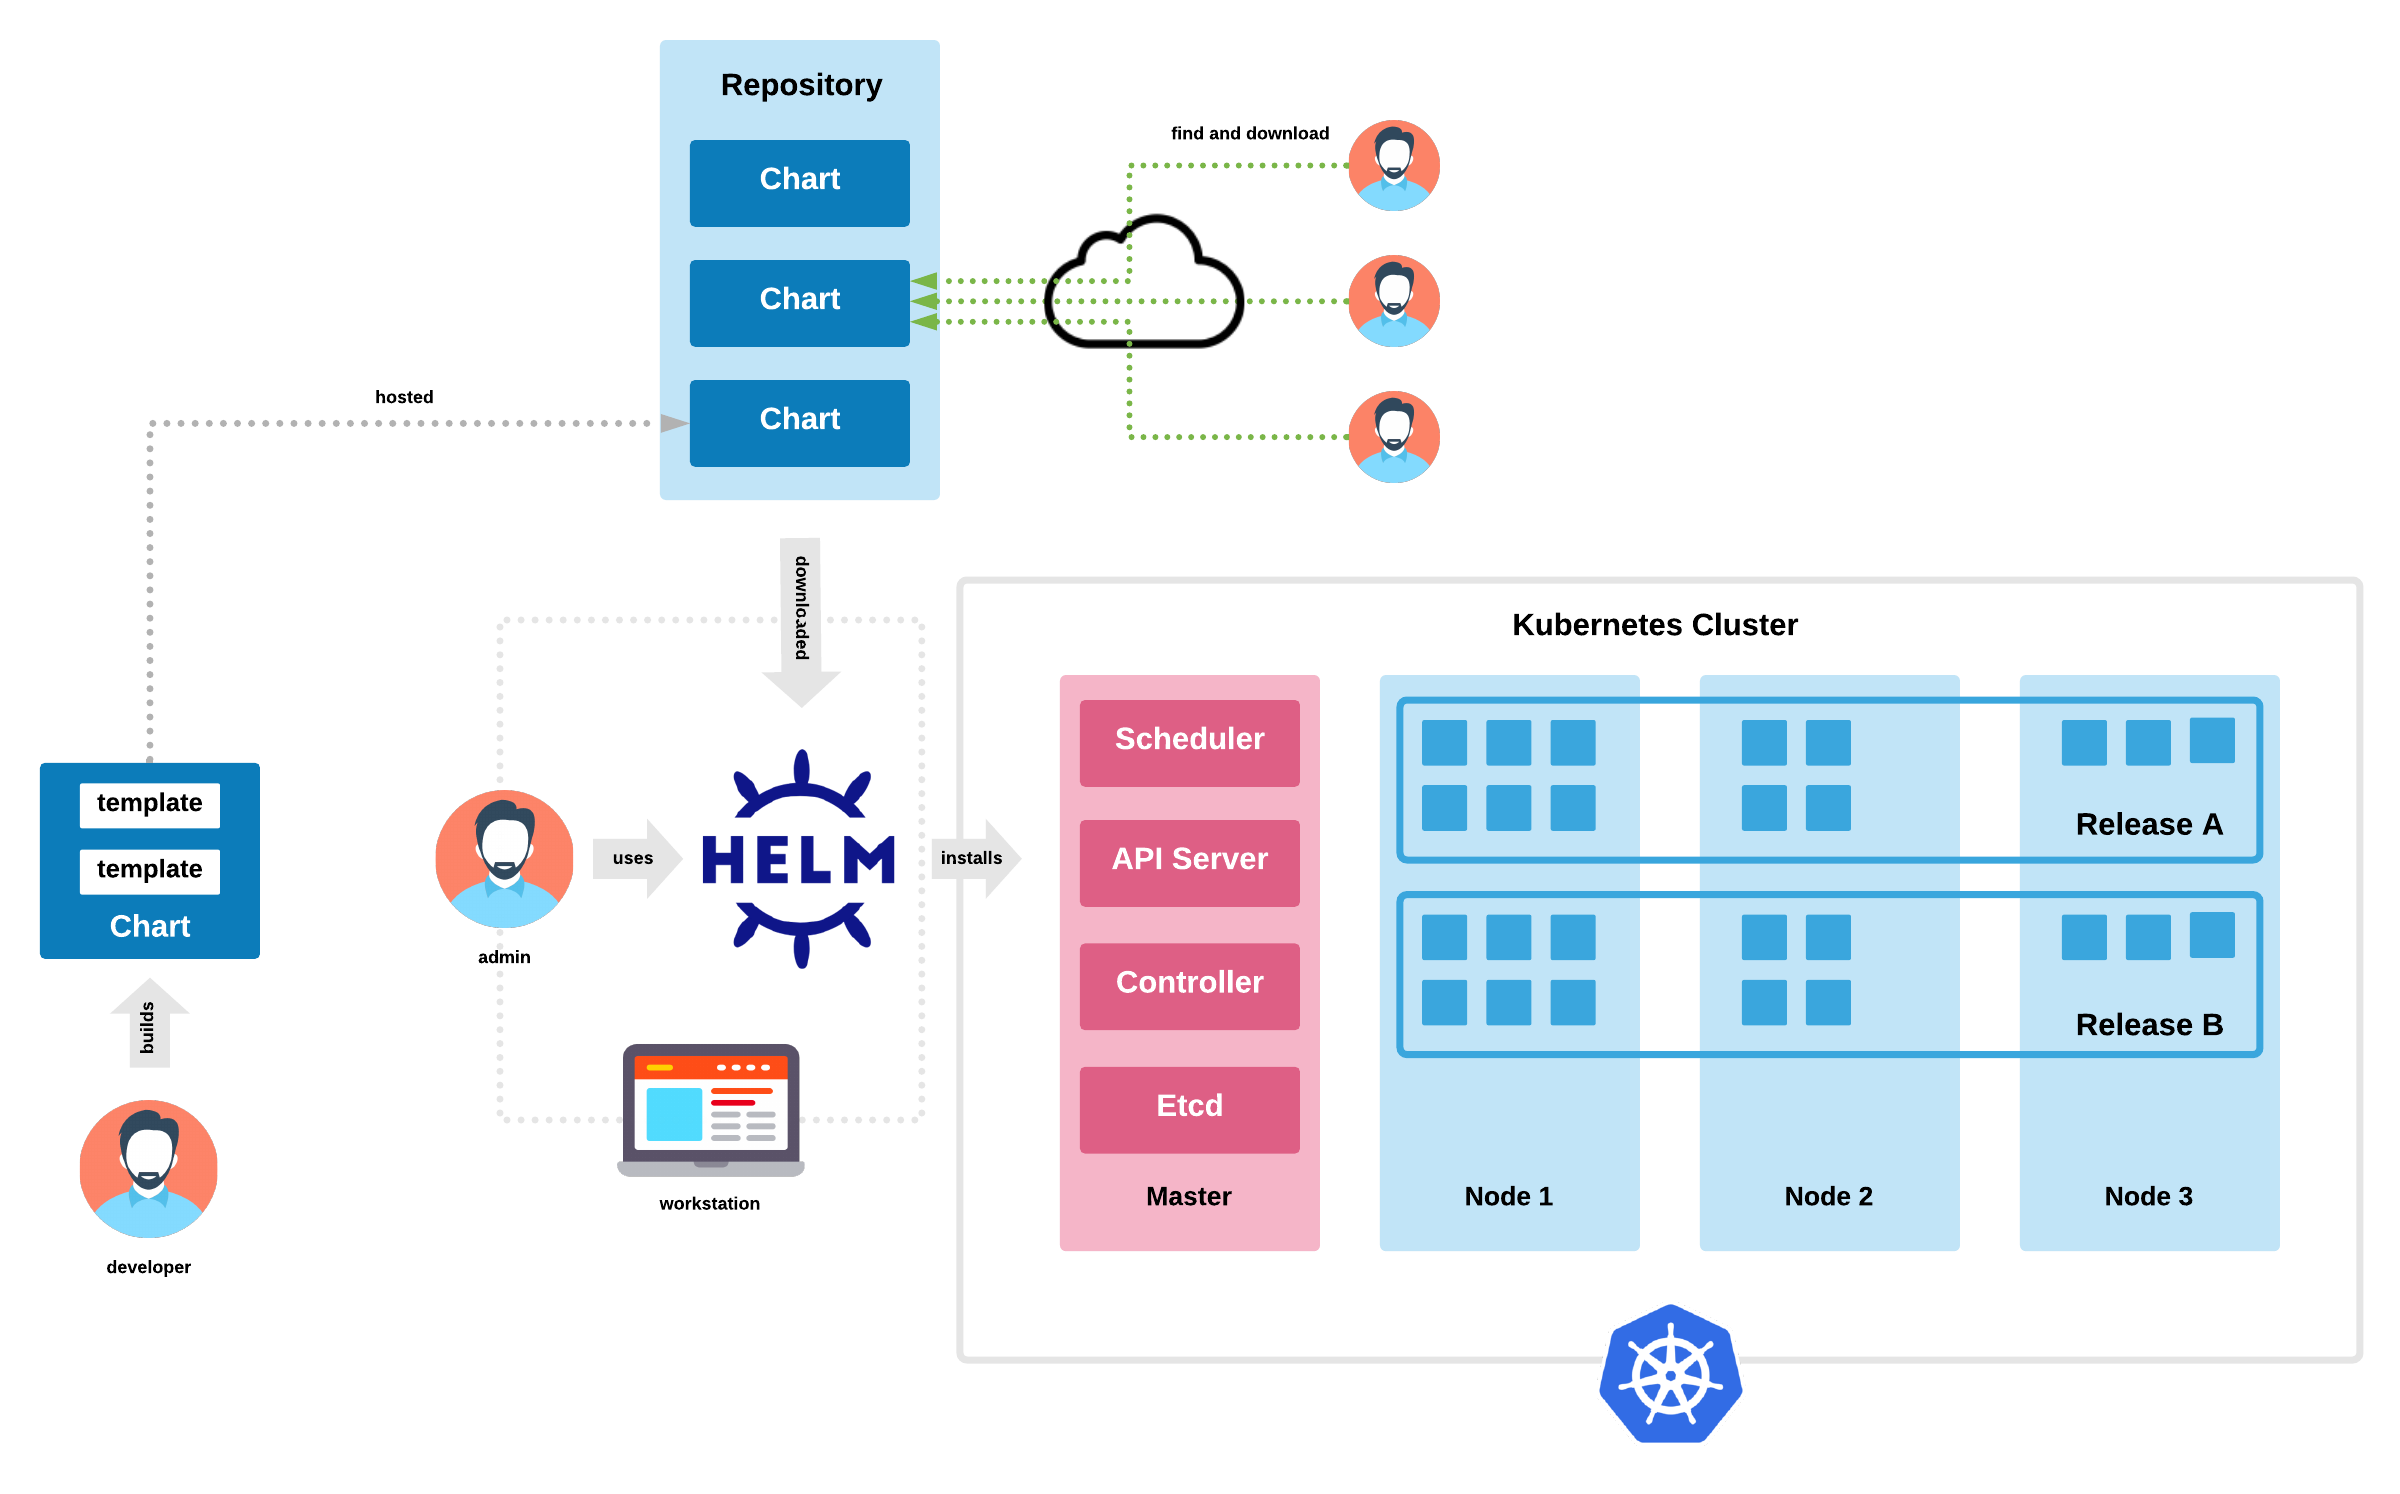
Helm is a package manager for Kubernetes like yum, apt, npm.
“Helm helps you manage Kubernetes applications — Helm Charts helps you define, install, and upgrade even the most complex Kubernetes application.Charts are easy to create, version, share, and publish — so start using Helm and stop the copy-and-paste.” -Source: helm.sh
Kubernetes Package and Deployment Manager
- Like apt or yum in Linux world.
- Automated version handling during upgrade/rollback.
- Share the deployment instruction as scripts.
- Templatize the deployments for easy customization.
- Store Templates in repository
- Search and reuse the templates
- manages the complete lifecycle of the application ( Create, install, Upgrade,Rollback,Status,Versioning)
Benefits
- Repeatability
- Reliability
- Manage multiple environment with same template
- Easy collaboration as everything will be defined in files
- Manage any complex environment
how to build, package, and install a Helm 3 custom chart:

Follow the instruction to install helm: helm Install
Helm Chart Github Demo project Demo
2.Introduction to helm hub
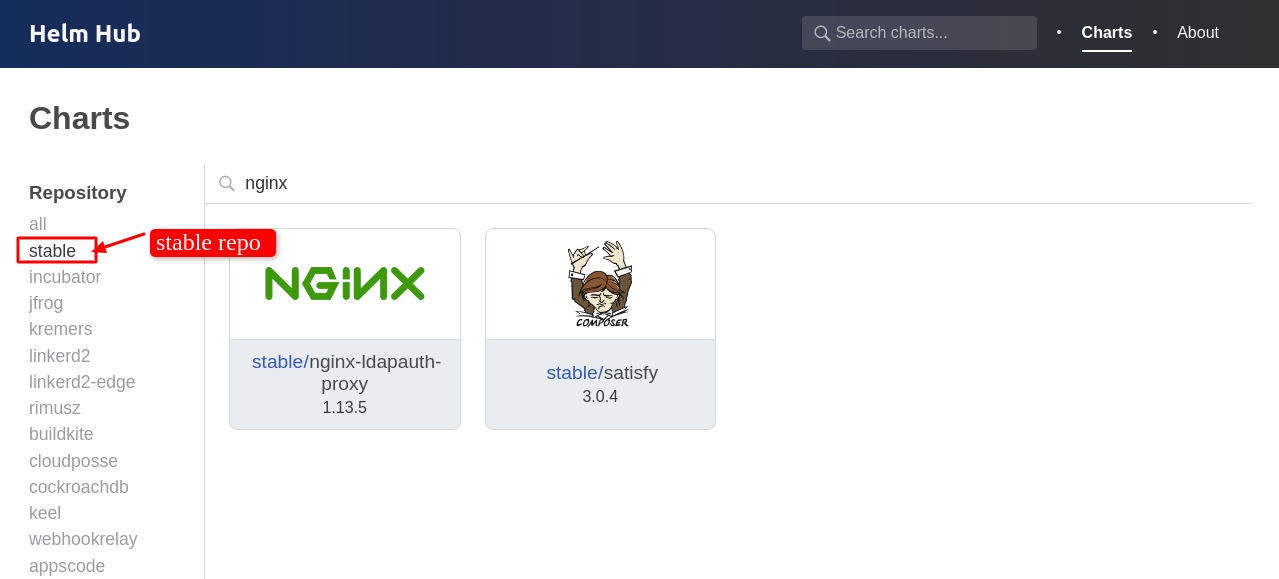
Helm was designed with many distributed repositories in mind. Like Debian APT repositories.The Helm Hub provides a centralized search for publicly available distributed charts. It is maintained by the Helm project. It can be visited at https://hub.helm.sh
Helm repositories can be hosted in many ways including as GitHub or GitLab pages, in object storage, using Chartmuseum, and via a service provider.

Useful Helm Hub Commands:
| Command | Description |
|---|---|
| helm search hub | All charts available within hub. |
| helm search hub | search specific chart |
| helm repo add stable https://kubernetes-charts.storage.googleapis.com | To configure a specific repository. Then run “helm search repo stable” |
| helm search repo stable/mysql | Try this command once stable repo is configured |
| helm repo list | To list all configured repository. |
| helm repo update | To update local cache from remote stable repo |
| helm install stable/mysql –generate-name | Install mysql from stable repo and auto generate name |
| helm install myairflow stable/airflow | Install airflow from remote repository with name “myairflow” |
| helm ls | Lists deployed charts |
| helm uninstall airflow | Delete any specific chart i.e “airflow” here |
3.Creating a Chart
Helm CLI, which we installed earlier, is quite handy in creating a chart:
“helm create devopsmonk-webapp”
Please note that the name of the chart provided here will be the name of the directory where the chart is created and stored.
Let’s quickly see the directory structure created for us:
devopsmonk-webapp
├── Chart.yaml
├── templates
│   ├── configmap.yaml
│   ├── deployment.yaml
│   ├── _helpers.tpl
│   └── service.yaml
└── values.yaml
├── charts
├── .helmignore
Let’s understand the relevance of these files and folders created for us:
- Chart.yaml: This is the main file that contains the description of our chart
- values.yaml: this is the file that contains the default values for our chart
- templates: This is the directory where Kubernetes resources are defined as templates
- charts: This is an optional directory that may contain sub-charts
- .helmignore: This is where we can define patterns to ignore when packaging (similar in concept to .gitignore)
3.1 Creating Template
Please refer files with github link
template
├── configmap.yaml
├── deployment.yaml
├── _helpers.tpl
└── service.yaml
If you are aware of kubernetes these templates will look familier. Note the liberal usage of text within double parentheses {{}}. This is what is called a template directive.
Helm makes use of the Go template language and extends that to something called Helm template language. During the evaluation, every file inside the template directory is submitted to the template rendering engine. This is where the template directive injects actual values in the templates.
We can do a dry-run of a helm install and enable debug to inspect the generated definitions: helm install –dry-run –debug ./devopsmonk-webapp
3.2 Providing Values
Now let’s understand how we can pass values to the template rendering engine. We typically pass values through Built-in Objects in Helm.
There are many such objects available in Helm, like Release, Values, Chart, and Files. We can use the file values.yaml in our chart to pass values to the template rendering engine through the Built-in Object Values. Let’s see how values.yaml looks like: Github Link
replicaCount: 2
image:
  repository: nginx
  pullPolicy: IfNotPresent
  tag: ""
service:
  type: ClusterIP
  port: 80
autoscaling:
  enabled: false
nginx:
  conf:
    message: "Devops-Monk helm tutorial 2020"
5.Useful youtube tutorial:
-
What is Helm in Kubernetes? Helm and Helm Charts explained.
-
How to create a Helm chart ?